Translate

Sunday, November 30, 2014

The Underthings

Luckily the top and stockings didn't take nearly so long as the dress to sew up.

Top for under the Christmas Dress

I used a new, yet uncomfortably ill fitting, t-shirt as the fabric source and the same Adams-Harris pattern I used for the dress. I also made white stockings for her from the same fabric.

Saturday, November 29, 2014

Dress for the New Girl

This took three very full days to complete. I started late one evening with cutting out the many pieces.

Today's project.

The next day I worked on sewing the bodice. With princess seams and fully lined there were a lot of pieces to deal with. I improvised a tiny "pressing ham" for the bust seams using a slightly felted ball of wool.

Pressing ham?

The zipper caused lots of angst. It had to be meticulously hand sewn. I got it all in, looking good, and removed the basting. It was then that I realized it was misthreaded and it split. I had to take out all that I had done and start over again!

Second time was successful. This is the first time I've gone to all the trouble of inserting a real (but tiny) zipper in doll clothing.

A zipper at last!

Layers of ruffles means lots of gathering and basting to do. There are two skirts, a lace layer, and an underlayer insert, all which had to be gathered and then hand basted before machine sewing.

Progress shot

It took hours!

More ruffles.

But the finished dress was well worth all the effort. I only hope it fits her when she arrives!

Christmas Dress

I still plan to sew a white top and stockings to go with it.

Friday, November 28, 2014

On Her Way!

A new doll size is on its way to me. Way back in August I ordered a Fairyland Feeple 60 moe-line girl with the "Rin" faceplate. That's "FM60 Rin" for short.

FM60 Rin!

This doll is bigger than any I've had so far. She stands 54cm tall, whereas the Minifees are only 41cm. I bought her more as a size model for  designing, sewing, and knitting than anything else as she is too large to interact realistically with the dolls I already own and will be displayed in an entirely different area. 

Now that I know she is on her way, and will for sure be arriving before Christmas, I'll go ahead and sew a dress for her that I bought the material for quite some time ago. It will be a Christmas dress in green, red, white with accents of gold.

Wednesday, November 26, 2014

Hanging Kitchen Towels

Much of the last two of days I've been busy sewing up fourteen hanging kitchen towels. I did it assembly line style saving myself from having to reset the sewing machine for various stitching tasks over and over.

First I cut out all the pieces for the toppers; two patterned fabrics and a piece of flannel for each of the towels.

Today's task

Once I had the seams sewn and trimmed I gathered the whole bundle and sat in my comfy chair in the living room to carefully turn each topper right side out and get it pinned in place in preparation for pressing.

Sewn, turned,

Each of the kitchen towels was cut in half and the raw edges were inclosed in a final seam of the topper.

Towels

Back at the sewing machine I made buttonholes. I used the machine to sew on the buttons too.

14 altogether

With one yard of fabric and 7 kitchen towels (total cost of less than $20 CAD), I was able to make 14 hanging towels, 2 each of 5 designs and 4 of the one printed with a cardinal.

Buttons and buttonholes

If you are wanting to create quick and easy Christmas gifts on a budget these might be just what you're looking for. The tutorial and free pattern are here: http://kleiosbelly.wordpress.com/2010/01/04/christmas-prezzies-6-1-for-you/#comment-1934

I'm keeping one each of the six designs for my kitchen, I let my daughter and granddaughters choose 3 for their kitchen, and will take 4 or 5 to the local elementary school for their Fun Night fund raiser. 

Stockings


Ready to be hung


Itty bitty stocking

The fireplace isn't ready yet. I have to finish the sides and then do something about a board for the mantel.

Monday, November 24, 2014

Paper Templates

I still need to do the stone work on the sides of the fireplace. I'll be tackling that today, if all goes well. But I set the fireplace upright so I could use paper templates to decide the appropriate size for the resin kids' stockings.

Testing for stocking size.

Then I got busy and embroidered their names on a scrap of red flannel.

A tight fit!

After taking the above picture I realized that I had somehow included and extra line in Pumpkin's name. D'oh! I've pulled that section out and redone in now.

I've done it this way, embroidering the names first, because I find it easier to embroider when I can get an embroidery hoop on a larger piece of cloth. I also find it easier to put two large pieces of fabric together and sew around an outline, and then cut the pieces out, when working with items this small.

Deciding on trims and a best plan for assembling now.

Sunday, November 23, 2014

Miniature Stone Work

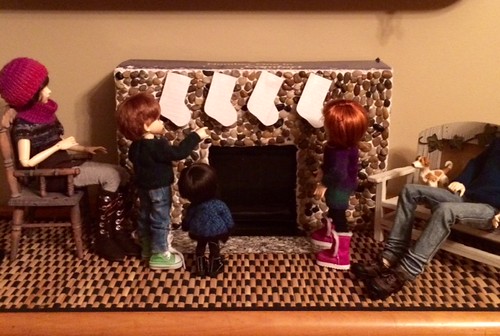
The things my doll hobby gets me into! Now I'm building a river rock fireplace.

The resin kids really wanted to hang their stockings on a fireplace this year so they begged me to build one.

Looking for suggestions

Please pardon the blurry, poorly set up photos in this post. All the pictures are taken on the fly, in low light, with just my camera phone.

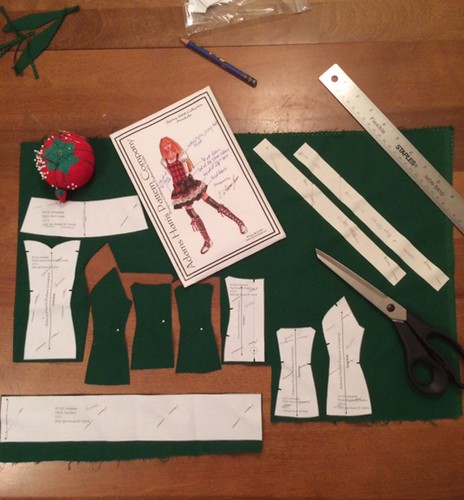
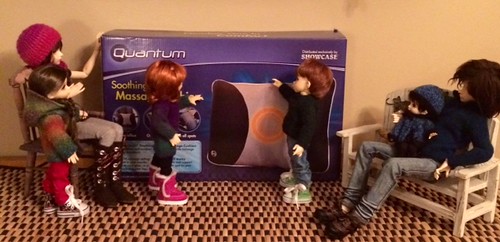
First a box of an appropriate size and shape needed to be chosen and agreed upon.

Step One

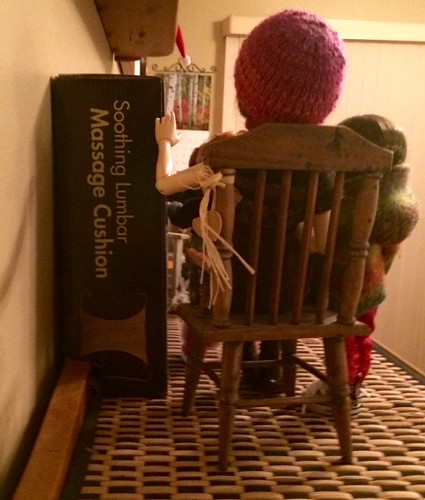
Then I had to cut a notch out of the lower back side of the box so that it will fit over a raised facade at the back of the cabinet the resin crew lives on, minimizing the space the structure will take and allowing it to sit firmly and securely against the wall.
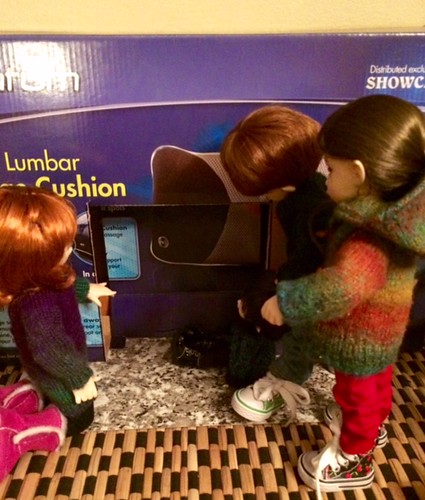
Step Two

Then following a "MyFroggyStuff" tutorial a hole was cut and folded to create the firebox.

The resin kids inspected it closely to be sure it was large enough for Santa.

Step Three and Four

That's as far as I got yesterday because a bit of a shopping trip was required. "Paper Clay" was needed and it is far too expensive to buy, but I found a tutorial online for a home made variety. I had the dry wall filler and the white glue already but needed to go out to find mineral oil and black Duck Tape. While at Walmart I also found a large bag of small river stones.

Shopping trip.

The Duck Tape is used to stabilize the folded cardboard of the firebox and to give it a realistic black colour.

Duct tape firebox

It was then time to mix up the batch of home made paper clay. I didn't want to destroy my electric mixer, bowl, measuring cups, or utensils by allowing paper clay to dry on them as hard as a rock so I filled my kitchen sink with hot sudsy water before I started and dropped those items into the sink as I was finished with them.

I forgot to take pictures of all the making and spreading of the paper clay "mortar", but it was fun. The first step of the recipe was to throw a roll of toilet paper into a bowl of water. How could that not be FUN?!

So then I spread the paper clay over the face of the box, much like icing a cake. While it was wet I pressed small river rocks into the "mortar".

Front Face

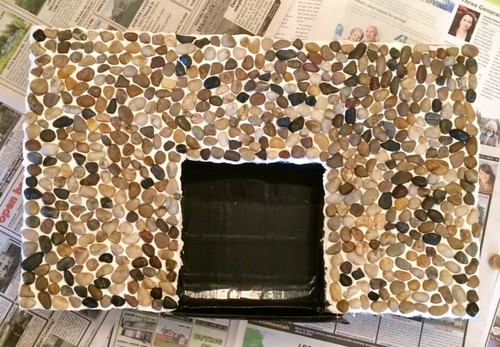
 I've only done the front face at this point. The rocks are heavy and I don't want them sliding or dropping off before the paper clay has a chance to dry. I'll do the sides when the work so far has dried. I have NO idea how long that will take.

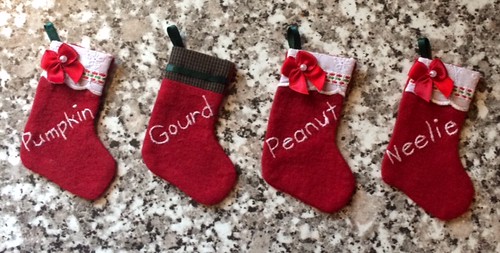
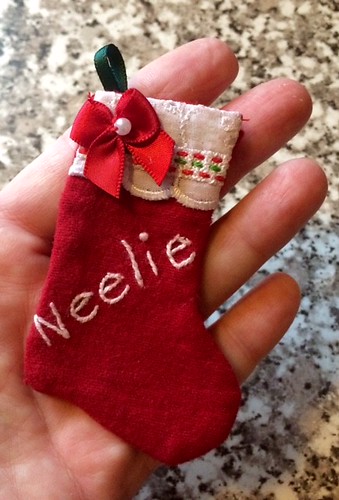
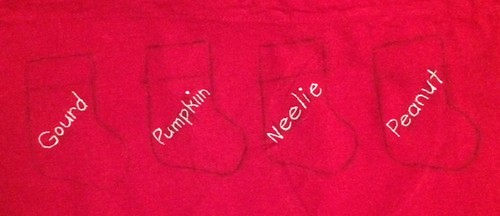
While that's drying perhaps I'll work on creating some small stockings. After all if they are going to hang stockings I guess they will need some?

Thursday, November 06, 2014

Quick Catch Up Post

I've been busy knitting and reknitting various doll clothes items in an effort to get a pattern collection for slim-mini, ball jointed dolls ready for publication. It's still a ways off, probably some time in December, but I have made progress.

Since the posting of the pullover with collar a while back I have designed a Ribbed Watch Cap --

Ribbed beanie

-- then I reknit it perfecting the decreases at the crown,

Better?

I'll have at least one more hat pattern in the collection. Probably something more like a slouchy beret.

I have also designed and knit a cropped cardigan.

Version One

The neckline of the first version stood away from the body unattractively so I reknit it and at the same time added bands at the sleeve edges.

Version Two

In that one I liked the improved neckline and the way the bands pulled the design together as a cohesive whole, but I felt that the bands on the sleeves looked too bulky, so I tried again with one less round of garter stitch.

Rockin' the Sock Dress

It was getting better but I still didn't like the way the sleeves were jutting out. One more knit through with a decrease of three stitches just before the arm bands and --

pattern photo

--- yes, I think this one will do.

final version

And now I must set aside the knitting for awhile. Tomorrow I have surgery to relieve carpal tunnel syndrome on my right hand. I'll have at least three days of sitting around doing very little other than reading and watching TV with my arm propped up. After that I can gradually start adding in more activity, but it will likely be about a week before I can knit with any comfort.